1. Clear out all cached app data
If you Go into the Apps storage setting screen and tap on an individual App, you’ll notice that each app has its own “cached” data ~ anywhere from a few "kilobytes" to "Hundreds" of megs, or even more.
The “cached” data used by your combined Android apps can easily take up more than a "gigabyte "of storage space.
These caches of data are essentially just junk files, and Can be safely Deleted to free up Storage Space. Tap the Clear Cache button to Take out the Trash.
If You poking through each and every app looking for cached data to clear sounds like a chore, there’s an easy way to clear all cached app data in one Click. Tap Settings > Storage > Cached data, then tap OK in the confirmation window.
2. Clean up the Downloads folder
Just like on a PC or a Mac, your Android device has a Downloads folder. It’s a favorite hideout for miscellaneous junk files downloaded from the Web or by your various apps.
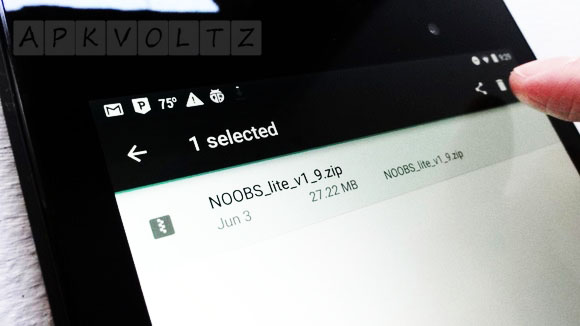
Open the app drawer and tap Downloads or Files to see what’s lurking inside. Tap the three-line menu icon in the top corner of the screen and sort the list of downloads by size, then take a look at what’s hogging the most storage space. If you see anything you don’t need, tap and hold the file to select it, then tap the Trash button.
3. Dump photos that are already backed up
Open the Photos app, Tap the three-line menu Button in the top left corner of the screen, then tap (Free up device storage). The Photos app will let you know how many pictures it can delete from local storage; tap (OK).
Note: If you’re using the “High quality” setting for unlimited but lower-resolution cloud storage of your backed up photos, keep in mind that the “(Free up device storage)” feature will delete your full-resolution originals. Make sure you’ve stored them elsewhere before you tap the OK button.
4. Unload your least-used apps
of course The solution, is to delete some of those apps~ideally, the ones you use the least. There are also several apps that can track your app usage and tell you which apps you’re using the least, among them: App Usage, App Tracker, and QualityTime. But the best judge of the apps you don’t want is you. You can either browse your app drawer to find any apps you don’t need anymore, or check out your library in the Play Store.
To find a list of everything on your phone, open the Play Store app, tap the three-line menu button in the top right corner of the screen, tap My apps & games, then tap the Installed tab. Next, tap the Sort button near the top-right corner of the screen, then pick an option, such as Size or—better yet—Last Used. If you sort your apps according to Last Used, scroll to the very bottom of the list to see which apps you use the least. See a seldom-used app you could do without? Tap it, then tap Uninstall.
5. Turn on smart storage
Android-Oreo includes a new Toggle called (Smart Storage) that can work wonders without needing to do a thing. Flip it on, and your phone will automatically clear out the biggest space-stealing culprit (photos and videos).
Android Oreo’s Smart Storage can free up space without your needing to lift a finger.
Since we all forget to clear out our (Photo Libraries) regularly, you can choose to automatically remove backed-up photos and videos after (30),(60),or (90) days, making sure you phone isn’t stuffed with Duplicate Photos.


Post A Comment:
0 comments so far,add yours